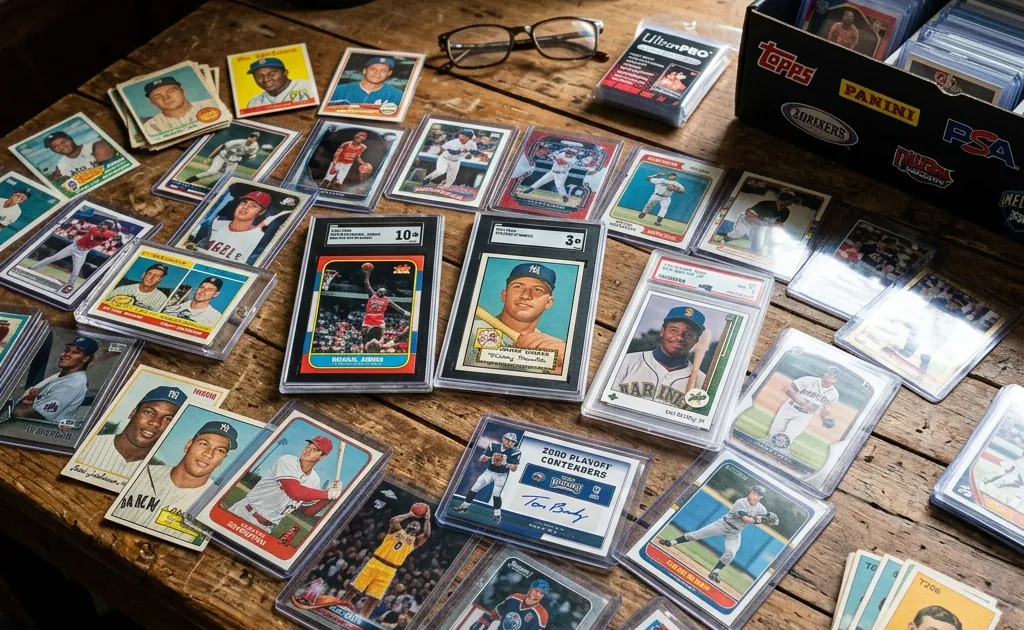
Document sports card condition by inspecting four areas separately: corners, edges, surface, and centering. Add front and back photographs, note lighting limits, and record defects without predicting a professional grade. A condition checklist helps you choose comparable sales and decide whether to seek grading; it cannot replace a grading service’s examination.
The most useful result is an evidence record: what you can see, what you cannot see, and what should be checked next. Do not label a card “gem mint” because it looks clean in one photograph. A surface mark, factory issue, altered edge, or centering problem can be hidden by glare or a sleeve.
The four inspection areas
| Area | Observe | Record carefully |
|---|---|---|
| Corners | Whitening, bends, soft tips, dings, rounded points | Which corner, front or back, and severity under repeatable light |
| Edges | Chipping, rough cut, whitening, dents, trimming concerns | Location, factory-cut context, and whether the edge is visible |
| Surface | Scratches, print lines, creases, dents, stains, gloss, residue | Front and back, angle used, and whether a mark is in the image or on the card |
| Centering | Border or design balance front and back | Approximate observation, measurement method, and design limitations |
PSA’s grading standards explain that corners, focus, gloss, staining, centering, eye appeal, and alteration concerns can affect its assessment. Beckett describes its own evaluation areas in its grading scale. These sources show why a home checklist is an observation tool rather than a grade calculator.
Before you inspect
Wash and dry your hands, clear a clean workspace, and avoid touching the card’s surface. Photograph the front and back before moving it into a sleeve or holder. Use diffuse light rather than a direct flash, and take an angled image when checking gloss or scratches. Keep the original files so later edits do not hide a defect.
Do not clean, rub, press, trim, recolor, or otherwise alter a card while inspecting it. PSA lists alteration and questionable-authenticity conditions among reasons a card may receive a special result or no numeric grade. If you suspect alteration, record the concern and seek appropriate specialist guidance.
Use the same inspection sequence every time
For a small batch, make the process boring and repeatable. Place one card on a clean, flat surface and record its identity before taking photographs. Capture the front and back square-on in diffuse light, then capture angled views with the light moved across the surface. Review the photographs at full resolution before handling the next card. Inspect corners first, then edges, surface, and centering; this keeps a dramatic surface reflection from distracting you from a soft corner or chipped edge. Label files with a short identity and side, such as 1989-upper-deck-rc-front and 1989-upper-deck-rc-back. If you retake a photograph, keep the earlier file and note why the new image is better. Never compare one card photographed under a desk lamp with another photographed in daylight without recording that difference.
Corners: inspect each point independently
Start at the top-left and move clockwise on the front, then repeat on the back. Look for whitening, a soft tip, a bend, a dent, or a crease. A corner can look sharp from the front while showing damage on the reverse. Write the location rather than using a single adjective.
Use a simple record such as “front top-right: slight whitening visible under diffuse light; back not yet confirmed.” That sentence communicates more than “near mint.” If a sleeve or holder obscures the corner, mark it unknown instead of inferring a clean point.
Corners can also be affected by photography. A crop may hide the outer edge, while glare can make a rounded tip look sharp. Take a second angle and compare the card with the original image. Do not press the card flat to make a corner appear better.
Edges: separate factory variation from damage
Inspect the long and short edges under the same light. Record chipping, whitening, dents, rough cuts, or a wavy appearance. Older issues and certain stock types may show factory-cut variation; that does not automatically make every rough edge damage, but it does require a careful description.
A suspected trimmed edge, recolored edge, or altered stock should be a stop condition for a casual grade prediction. Keep the observation separate from authenticity. A card can have a factory issue, handling wear, or a more serious alteration concern, and a photograph alone may not resolve which one applies.
Surface: change the angle, not the card
Surface inspection needs controlled movement of the light or camera. Look for scratches, print lines, dents, wrinkles, stains, residue, roller marks, and gloss differences on both sides. Avoid rubbing the surface or using liquids. A sleeve can introduce reflections and make a clean card look scratched, or hide a line entirely.
Record whether a mark is visible straight-on, at an angle, or only in a high-resolution image. Note if the card is still in a holder. If a scanner or phone image cannot resolve the surface, say “surface unresolved” and request a better image.
Print lines and factory marks should not automatically be described as damage. Record their position, length, and repeatability across angles. The eventual service may apply its own standards and judgment. Your job at home is to preserve evidence and make a better comparison cohort.
Centering: measure with context
Centering is a relationship between borders or design elements, not a universal visual impression. Photograph the full card squarely and keep the camera parallel to the card. If borders are visible, use a ruler or image tool to estimate left-to-right and top-to-bottom relationships, and record the method.
Some cards have irregular borders, full-bleed designs, cuts, or artwork that makes a simple border ratio unreliable. Mark the measurement as approximate when the design does not provide clear reference lines. Do not turn a home estimate into “PSA 10 centering.” PSA’s published standards include service-specific tolerances and also discuss eye appeal; they are not a promise about a particular card’s outcome.
Check the reverse as well as the front. A card may look balanced on the front and visibly shifted on the back. Keep both observations in the worksheet.
A repeatable condition worksheet
| Field | Observation |
|---|---|
| Card identity and checklist reference | |
| Photograph date and lighting | |
| Front top-left / top-right corners | |
| Front bottom-left / bottom-right corners | |
| Back corners | |
| Long and short edges | |
| Front surface | |
| Back surface | |
| Front centering method and observation | |
| Back centering method and observation | |
| Sleeve, holder, or image limitation | |
| Alteration or authenticity concern | |
| Unknowns requiring another view | |
| Confidence in the record | High / medium / low |
Use one row per card and attach the original front/back photographs. The confidence field describes your evidence record, not the card’s quality. “Low confidence” can simply mean that the sleeve hides the edges or the image is too reflective.
Condition is not a numeric grade
A home inspection can sort cards into comparison cohorts such as “visible surface mark,” “corners unresolved,” or “front and back appear clean under stated light.” It cannot assign PSA, BGS, or SGC grades. Even grading services describe standards that include judgment and eye appeal, and each company uses its own label system.
Keep raw observations separate from slabbed labels. If you compare sales, use the raw vs. graded workflow and record service, grade, qualifier, and certification. Do not compare a raw card described as “mint” with a graded card merely because the words sound similar.
Choosing comparable sales
After identity and condition are documented, use How to Find and Compare Sports Card Sold Comps and How to Value Sports Cards with Comparable Sales. Match year, product, card number, parallel, serial status, autograph or memorabilia wording, and raw or graded format. Keep asking prices separate from completed transactions.
If your card has a visible defect that the closest sale does not show, record the mismatch. Do not subtract an invented percentage. A better next step may be more photographs, a larger matching cohort, or professional review.
When to stop and seek help
Stop a home conclusion when the card’s identity is unresolved, an edge appears altered, authenticity is questionable, a crease may be present, the surface cannot be photographed clearly, or the decision has insurance, estate, or legal consequences. A scanner can help organize a candidate identity, but it cannot settle those questions from a blurry image.
If you are considering submission, read Should You Grade a Sports Card Before Selling It? and Is Sports Card Grading Worth It?. Record current service terms, shipping, insurance, turnaround, and downside risk separately. A clean checklist is useful even when the right answer is to keep the card raw.
A concise condition summary
End your record with four sentences: what card you identified, what each inspection area showed, what remains unknown, and what action follows. For example: “The front and back match the checklist. Corners and edges look clean in diffuse light, but the back surface is unresolved because of sleeve glare. Centering is approximate and the design has no clear left border. Retake the back image before comparing graded sales.”
That summary is honest, reusable, and easy for another collector to audit. It keeps the evidence boundary clear and avoids claiming a grade the inspection cannot support.
Editorial and source notes
Reviewed October 29, 2026 by the SportsCardValue Editorial Team. Grading standards and service terms can change; consult the current primary service pages before submitting a card. This guide is educational condition documentation, not grading, authentication, appraisal, or investment advice.
Identify and Research Your Sports Cards
Download the Sports Card Scanner & Value app to identify, catalog, and track baseball, basketball, and football cards. Confirm the exact card and condition before relying on an estimate.